Building The Body Shell
| How To Series ... Building
A Brass Caboose (Page #1) Building The Body Shell |
| I have over 40 emails asking me to produce a
Step-by-Step photo "essay" on how difficult [NOT!] it is to
build a brass caboose. The kits are etched meaning sheet brass is exposed
to an acid and dissolved away (partially or fully) in places and not in
others. What controls where this happens is the artwork. For what I am
doing, it can be quite complicated but produces details that are usually
seen with castings. The detail is a combination of layering of metal
sheets together and a multi-pass etch process on each sheet.
All of my Brass kits have tabs & slots to align the pieces together for securing. You can use either CA Glue (as I am using on this caboose) or you can solder. Resistance soldering is best and anyone interested in getting one at a reasonable price can email me from my site and I can direct them to a great price ($300 instead of $500). |
|
|
|
|
| Here is the SP C-40-3 Caboose sheet right out of the etcher. There is details on both sides of the pieces. The easiest way to remove the brass parts from the sheet they are produced on, is to use an Xacto knife. The brass is soft and won't affect their future cutting ability. This will reduce or eliminate the amount of filing to smooth the edge. The next best way is with small sharp diagonal cutters that will fit into the small areas between the part and the sheet holding them. You should always use a file to remove the balance of the tie. This will ensure a perfect fit. | 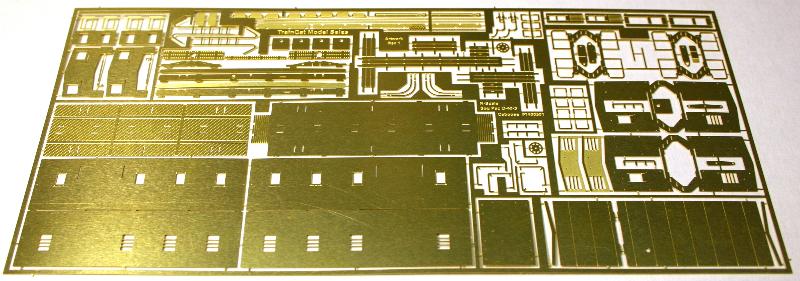 |
|
|
|
| Remove the basic shell sections; Sides, Ends And Inner
Floor. The Sides & Ends fold with a solid back and a half-etched
detail outer layer. Begin by folding the Sides and Ends.
Important Note: |
 |
|
|
|
| When the Side and End halves are folded together, you can begin to see the layers of details. | 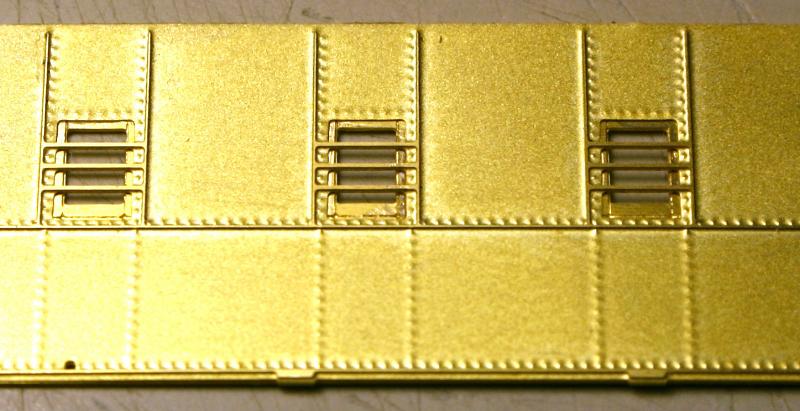 |
|
|
|
| The Inner Floor has tabs that go into slots on the back of the Sides. Begin attaching the first Side to the Floor. Be sure the wood plank detail on the Landings is facing up. |  |
|
|
|
| Slide the Landing through the slot on the End and secure
the End to both the Inner Floor and the First Side.
Important Note: |
 |
|
|
|
Note: This document is preliminary. Items contained
within may change without notice. | |