Adding Details to the Caboose Ends
| How To Series ... Building
A Brass Caboose (Page #4) Adding Details to the Caboose Ends |
| Up to this point, you may have been looking at the corners of the caboose and not liked seeing all the layers at the joint. Neither do I. Fortunately for the model, it follows the prototype here. The next item to be installed is the Corner Fascia. This is half etched metal with a .001" dashed line down the middle to aid in bending. Bend the Fascia down the dashed line and install over the corners. Ensure the cutouts go around the holes for Railings. | 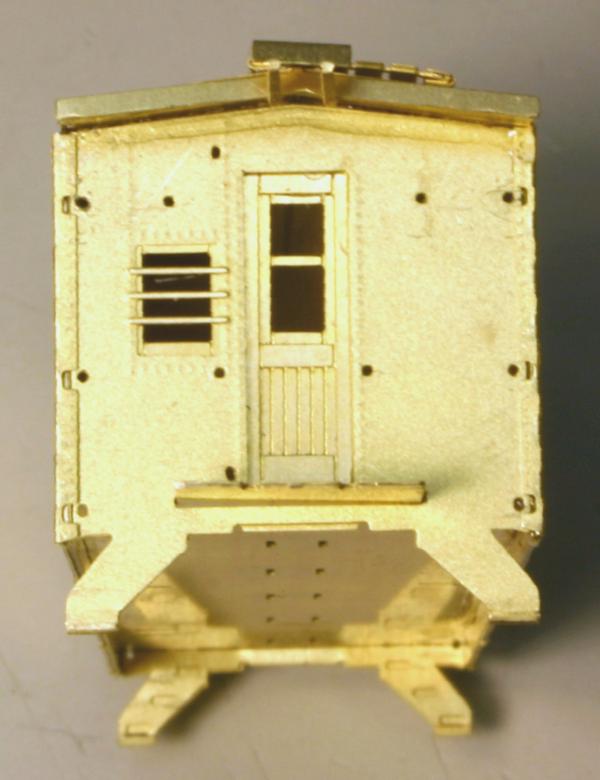 |
|
|
|
| Install two "Large" grabs near the top of the
doorway. The caboose ends are slightly different. Each ends has it's own
type of end Railings. More on that in a minute. What both types of
Railings have in common is how they are designed and how they are attached
to the caboose. Each Railing has a small support that must be bent 90
degrees to the Railing and then inserted in the appropriate hole. The
supports are bent along the etched bend line. Study the photo.
There are three "L" railings and one "h" shaped railing. Use the "h" railing on the end that has a hole above and left of the end door. Use a pair of tweezers and bend the Railing supports 90. The Railings are different in that you bend the support away from the bend line instead of into the bend line. Secure the railings to the caboose end. |
  |
|
|
|
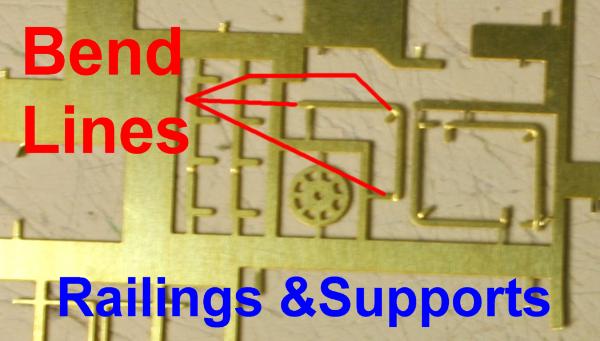
| Study the photo for the End Railings. The blue lines
indicate where to cut attachments. The red lines show where to find the
half etched bend lines. End Railings are also different in that you bend
the two halves away from the bend line instead of into the bend line.
The End Railing goes up under the Porch Landing with the two center Stanchions going into the notches in the Landings. Secure the End Railing to the Landing. Secure the upright to the Roof Fascia. |
  |
|
|
|
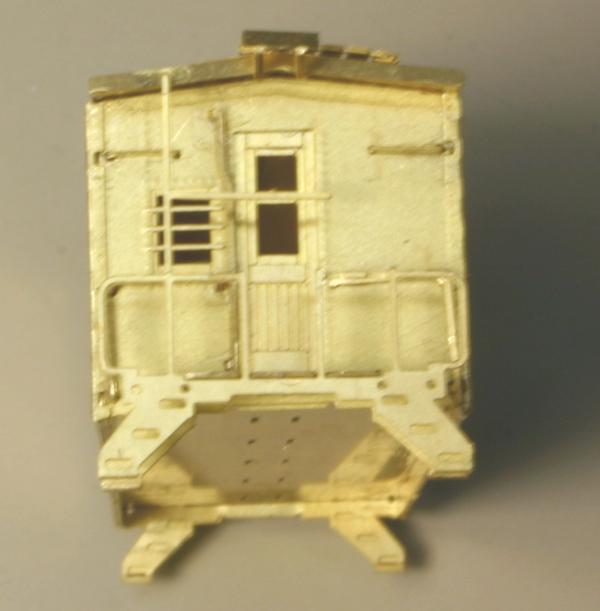
| Here is how it looks so far. | 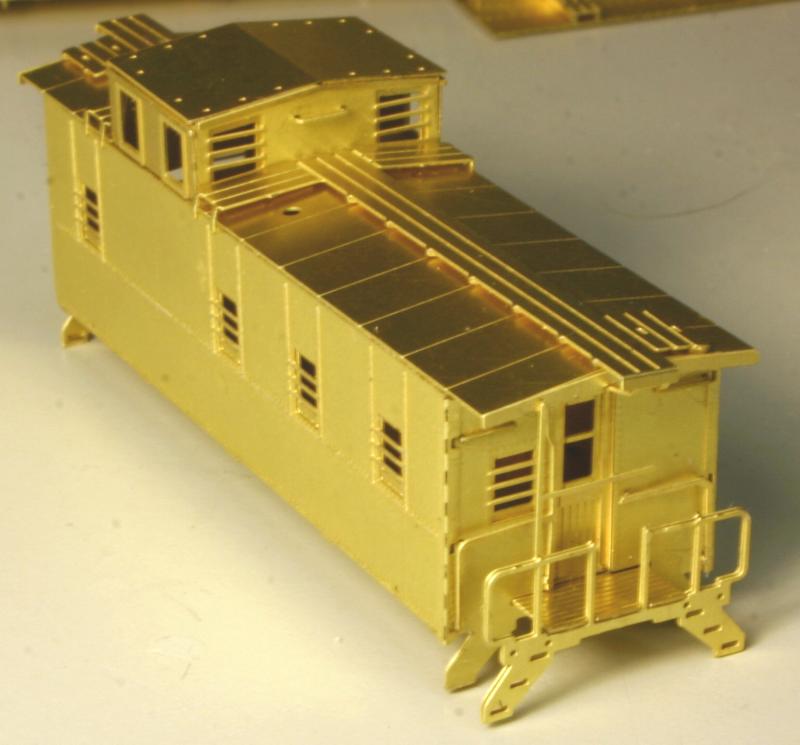 |
|
|
|
| Time to add the Steps. Remove then from the sprue. Notice the ends of the Steps have tabs and the Stair Braces have notches. Place the tabs of the Steps into the notches of the Stair Braces. Secure them. | 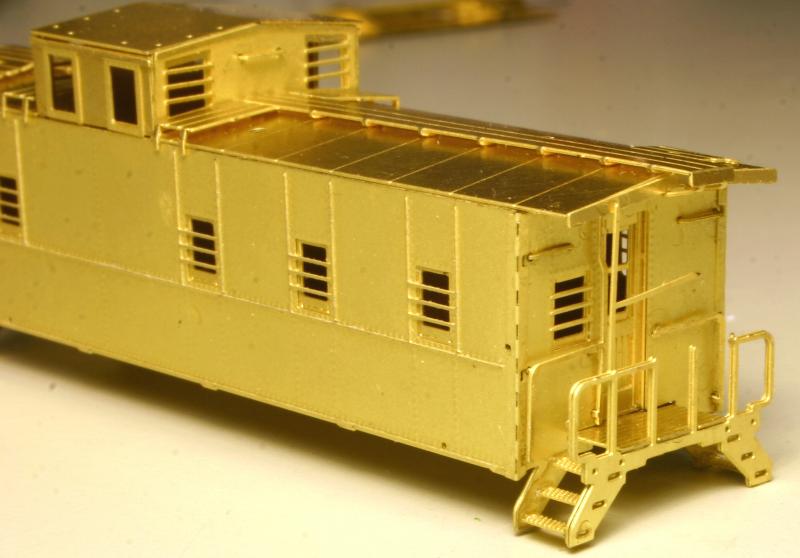 |
|
|
|
| Retrieve the following parts; Air Valve, Bumper, Small Grabs(2), Ladder and a length of etched Chain. Begin by bending the vertical pieces of the Ladder on the bend lines. The Ladder is different in that you bend the vertical piece away from the bend line instead of into the bend line. |  |
|
|
|
| Look where the Ladder will go into the End Railing. Trim
enough of the Railing away using rail nippers to fit the Ladder. Secure
the Ladder first up top on the Roof Walkway, then secure to the Railing.
Secure the horizontal bar to the Ladder.
Secure a length of chain across the center opening of the Railing. The builder should have noticed a opening for the pipe from the Air Valve to pass through the Bumper. This goes on the right side of the caboose. Place the two Small Grabs in the Bumper and then place the Bumper on the caboose. Secure the Bumper on the LEFT SIDE ONLY. Once secure, remove the right Grab and secure the Air Valve to the Railing. The down pipe should go through the opening in the Bumper. Once secure, re-install the Small Grab into the Bumper over the down pipe. |
 |
|
|
|
| Secure the curved Safety Railings to each corner of the
caboose.
Almost finished, How does it look ?? |
 |
Note: This document is preliminary. Items contained
within may change without notice. | |